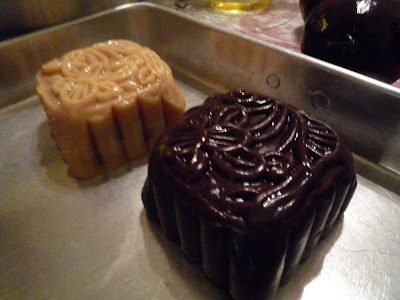
So that's when we started to plan our mooncake making party. 8 gals with a do or die mission. (plus poor hubs as by default he had to be in, the party was at my place)
 Mooncakes - the ultimate killer diet formula - its all about oil, carbo and sugar
 Mooncake moulds. I like squishing the cake out from these moulds and seeing the pretty designs on em.
That's us in the beginning. At this point, everyone was still enthusiastic and full of hope - har har

Mooncake skin:
1 cup golden syrup
1/3 cup oil
3/4 tsp alkaline water
1/2 tsp soda bicarbonate
350g cake flour
- Combine the first 4 items in a mixing bowl. Set aside for 1 hour or more.
- Slowly stir in the flour, mix into a dough and set aside for another 4-5 hours. Leaving it overnight would be good too as the dough would be more 'flexible' and easier to work with.
Note: the last part of mixing in the flour is pretty tough. Get a sturdy wooden spoon and a guy with muscles
Now for the lotus paste filling
Mooncake filling:
600g lotus seeds
1/2 tbsp alkaline water
400-425g castor sugar (use less if you feel guilty)
2 cups groundnut oil (use Knife brand)
60g maltose
60g melon seeds (lightly toasted)
A LOT OF PATIENCE AND PERSEVERANCE (i'm serious here)
- Boil lotus seeds in water with the alkaline water. Test to see if skins can be removed easily. This should take about roughly 20 mins. Wash and remove the skins immediately.
Note: This part is really tedious. Ensure you have a good supply of friends who have no idea what you're gettin 'em into


- Cool and blend them up until they become a smooth, thick liquid. Add a little bit of water if necessary but don't add too much.
- In a cooking pot, put 1 cup of oil and half of the sugar needed. Cook the sugar till golden brown then add the blended lotus. Continue cooking at moderate heat. When all the oil has been soaked up, slowly add in the remaining oil and sugar. Add in the maltose.
Note: You have to keep stirring thoughout the entire cooking process or the paste may burn. I couldnt even stir for more than several minutes coz the paste was so darn heavy!
 - When the paste is thick and no longer sticks to the pan (like above) its almost ready. Test with a knife. Cut the paste and if it doesnt stick to the knife then its done.
 Note: Be alert at this point. Overcooking it would spoil the whole thing as the oil would then start to come out. We learnt this the hard way - some of our batches didnt turn out due to overcooking.
- Remove and cool. If possible, leaving it to cool overnight would be best.
 Add salted eggs yolk if you like em. Wow, don't they look like some sort of alien eggs? Steam em first.
Ok here's the done paste, with the lightly toasted melon seeds
Now start making the cake!
- Divide the mooncake skin dough into 40g balls and the lotus filling paste into 120g (if u intend to add the egg yolks) or 150g (without the egg yolks)

- You see the skin in the background? Roll it out thinly. In the front is the lotus paste filling. Flatten it slightly and put the egg yolk in the middle.
 - Roll the lotus paste into a ball then wrap the skin around it. Do it carefully to avoid tearing. Try to get the skin around as evenly as possible.
  - Next, grease the mooncake mould well. Press the mooncake ball into the mould carefully. even out the surface.
  - Press it out and

Anyway, bake the mooncakes in the oven at 180 deg C. for 10 mins. Take out and glaze them with egg glaze
Egg glaze = 1 egg yolk,1 tbsp water and a pinch of salt.
Leave to cool for 10 mins and then pop them back into the oven to bake for another 10 mins.


